
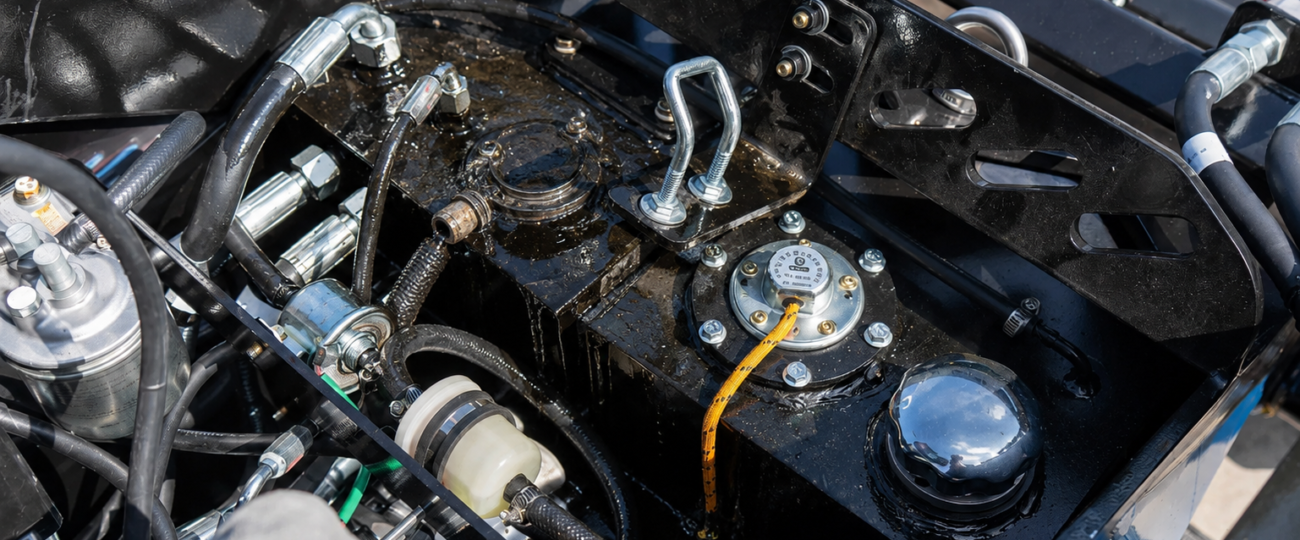

Hydraulic oil turns milky? 1 test finds the water entry point in 5 minutes
☰ Table of Contents
You check your hydraulic oil. It looks like milk. Cloudy white. Milky pink. Milky gray. Something is wrong.
Water entered your hydraulic system. You check your machine and suddenly your hydraulic oil turns milky. The hydraulic oil turns milky because water mixes with oil. The mixture creates a cloudy emulsion. This emulsion damages your machine.
This post shows you one test. The test finds the water entry point in 5 minutes. You stop the water entry. You save your hydraulic system. You avoid expensive repairs. If you also have trouble digging through tough terrain, read why our bucket teeth keep breaking and how to change 1 setting to stop it.
Water and oil do not mix. The oil forms tiny droplets around each water particle. The mixture looks milky. The hydraulic oil turns milky because the droplets scatter light.
This milky appearance is a warning. When your hydraulic oil turns milky, you have a water contamination problem. It causes three distinct issues:
- Problem one: Water reduces lubrication. The oil film between moving parts breaks down. Metal parts touch each other. Metal wear accelerates. Pump wear. Valve wear. Cylinder wear.
- Problem two: Water causes rust. Steel components rust inside the system. Rust particles float in the oil. These particles act like sandpaper. They score cylinder walls. They score valve spools. They score pump pistons.
- Problem three: Water breaks down the oil additive package. Additives prevent foam, oxidation, and corrosion. If you don’t act when hydraulic oil turns milky, the oil loses its protective properties.
If your hydraulic oil turns milky, the vacuum test finds your water entry point. This test takes 5 minutes. It requires one tool. A hand-held vacuum pump with a gauge. This tool costs 50 dollars. Every operator should own one.
Here is how the test works. You isolate each hydraulic component. You apply vacuum to that component. You watch the gauge. A vacuum drop indicates a leak. That leak is your water entry point.
Water enters the system through leaks. Leaks occur at seals. Leaks occur at fittings. Leaks occur at breather caps. The vacuum test finds every leak.
- Park safe: Park your machine on level ground. Lower all attachments to the ground. Shut off the engine. Lock out the machine.
- Remove cap: Open the hydraulic tank breather cap. The breather cap sits on top of the hydraulic tank. Remove the cap carefully.
- Connect pump: Connect your vacuum pump to the breather port. Use the correct adapter. Most machines use a standard thread size.
- Test tank: Pump the vacuum pump to 10 inches of mercury. Watch the gauge. The reading should hold steady. If the reading drops, you have a leak in the tank or return line. This is one water entry point.
- Test swing motor: If the tank holds vacuum, move to the swing motor. Isolate the swing motor by closing its isolation valve. Apply vacuum to the case drain port. A vacuum drop means a worn swing motor seal.
- Test drive motor: Isolate the drive motor. Apply vacuum to the case drain port. A vacuum drop means a worn drive motor seal.
- Test cylinders: Extend each cylinder fully. Apply vacuum to the rod seal area. A vacuum drop means a worn rod seal.
- Test fittings: Spray soapy water on the fitting. Apply vacuum to the system. Bubbles at the fitting mean a leak.
- Test cooler: Apply vacuum to the cooler inlet. A vacuum drop means a cracked cooler tube. Water from the engine coolant enters through this crack.
- Document & Fix: Document every location where the vacuum drops. These locations are your water entry points. Fix each entry point. The issue where your hydraulic oil turns milky will stop.
Frank operates a 25-ton excavator at a road construction site in Ohio. He noticed his hydraulic oil turns milky after every rainstorm. He changed the oil three times. The problem returned.
I visited his site with my vacuum pump. I tested the tank. Vacuum held. I tested the swing motor. Vacuum dropped fast. I removed the swing motor. I found a worn shaft seal. Rainwater entered through this seal every time it rained.
I replaced the seal. I changed the oil. I tested the system again. The problem where hydraulic oil turns milky stopped completely. Frank saved 500 dollars on oil changes. He saved 1000 dollars on pump wear. He saved 2000 dollars on cylinder repairs.
The vacuum test took 5 minutes. The seal replacement took 2 hours. The total cost was 100 dollars for the seal. Frank called me the next week. He asked me to test his other machine.
The vacuum test finds most entry points. Some entry points require different checks. Knowing how water enters helps when hydraulic oil turns milky.
- Breather cap failure: A failed breather cap lets rainwater enter. Replace the breather cap every 500 hours.
- Condensation: Temperature changes cause condensation. Moisture forms inside the tank. The hydraulic oil turns milky from condensation. Run your machine to operating temperature daily to evaporate it.
- Pressure washing: High pressure water forces past seals. Use low pressure cleaning near hydraulic components.
- Leaking cylinder rod seals: Worn seals let water enter during rain or washing. Replace rod seals at 2,000-hour intervals.
- Contaminated oil drums: Rainwater enters drums sitting outside. You pour contaminated oil into your tank. The hydraulic oil turns milky immediately. Store drums indoors.
You found the water entry point. You fixed the leak. Now you must remove the contaminated oil. Follow this procedure:
- Drain the tank: Drain it completely. Remove the drain plug. Dispose of it properly. Do not reuse milky oil.
- Change the filter: Replace the filter with a new genuine filter. The old filter captured water, rust, and broken down additives.
- Flush the system: Add new oil to the tank. Run the machine for 5 minutes at low idle. Cycle all functions to circulate the oil. Drain the flush oil. Change the filter again.
- Fill with fresh oil: Use the correct oil type. Fill to the correct level. Run the machine for 10 minutes. If the hydraulic oil turns milky again, you missed an entry point. Repeat the vacuum test.
If your hydraulic oil turns milky, your machine is already absorbing damage. A hydraulic pump operates with tight clearances. Water reduces the oil film between these parts. Metal contacts metal. Wear accelerates.
| Water Content | Impact on Pump Life |
|---|---|
| 3 percent | Pump wear increases noticeably |
| 5 percent | Pump life drops 50 percent |
| 10 percent | Pump life drops 80 percent |
Your hydraulic oil turns milky at 1 percent water content. Your machine is already damaged at this point. Every hour you run with milky oil reduces component life.
Valve spools wear from water contamination. Internal leakage reduces machine performance. Cylinder seals harden from water exposure. Hard seals crack and leak oil externally.
Repair Costs Add Up: Pump replacement costs $5,000. Valve replacement costs $3,000. Cylinder rebuild costs $1,500. Seal replacement costs $500. In contrast, the vacuum test costs $50. The oil change costs $300. The fix costs $100. Total proactive cost: $450.
Prevention is better than repair. Use these practices to keep water out of your hydraulic system.
Daily & Weekly Habits
- Inspect breather caps weekly.
- Grease cylinder rods daily to repel water.
- Check oil drums before use (look for rust/dents).
- Inspect seals during your daily walk-around.
Long-Term Prevention
- Park your machine under cover (rain is the #1 enemy).
- Run machine to operating temp daily (evaporates condensation so your hydraulic oil turns milky less often).
- Don’t use high-pressure washers near sensitive seals.
Some water entry points require a mechanic. Call for these situations:
- Cracked hydraulic cooler: Cooler repair requires welding. Welding requires certification.
- Worn swing motor seal: Swing motor removal requires special tools and precision.
- Worn drive motor seal: Drive motor removal requires heavy lifting and specialized knowledge.
- Internal pump damage: Pump disassembly requires clean conditions and precise clearances.
If you still see that your hydraulic oil turns milky after basic fixes, call for these situations. Let the mechanics handle the complex repairs. You handle the simple seal changes, breather cap changes, and oil changes.
You now know the vacuum test. You know how to find water entry points. You know how to fix them. You know how to change your oil. You know how to prevent future contamination.
Next time your hydraulic oil turns milky, do not panic. Do not call a mechanic immediately. Do not change oil without finding the entry point. Perform the vacuum test first. Find the leak. Fix the leak. Change the oil.
Have you ever noticed your hydraulic oil turns milky? What entry point did you find? How did you fix it? How long did it take? Share your story below to help other operators.
Looking for compact power with precision hydraulic sealing to prevent these issues? Upgrade your fleet with our premium compact loaders.
View TYPHON Stomp X1300 Mini Skid Steer →Heavy equipment operations and maintenance powered by TyphonMachinery.com





[…] wear. Turn one screw to fix it. If you recently learned how to diagnose issues, like when your hydraulic oil turns milky, 1 test finds the water entry point, then you already know how quick checks save […]